

SKINCARE 101:
Guide to Gua Sha
Tips:
- Press your tool with the same force as you would when buttering bread
- Always work from the center of the face outward
- Keep your gua sha tool in the refrigerator for a cooling, soothing experience
- Apply serum before starting to increase glide

Step 1: Neck – 3 times
Using the flat side of the tool, lightly glide the stone down the sides of the neck. Avoid directly gliding the tool over the front of the neck.
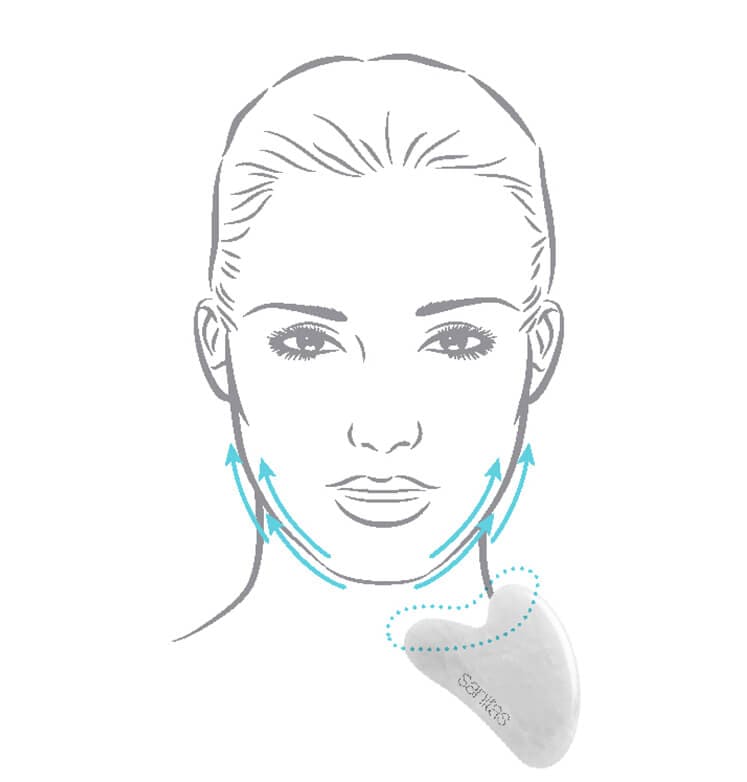
Step 2: Chin/Jawline – 5 times
Using the notch of the tool, start at the center of the chin and slowly glide towards the ear. Do one side at a time.
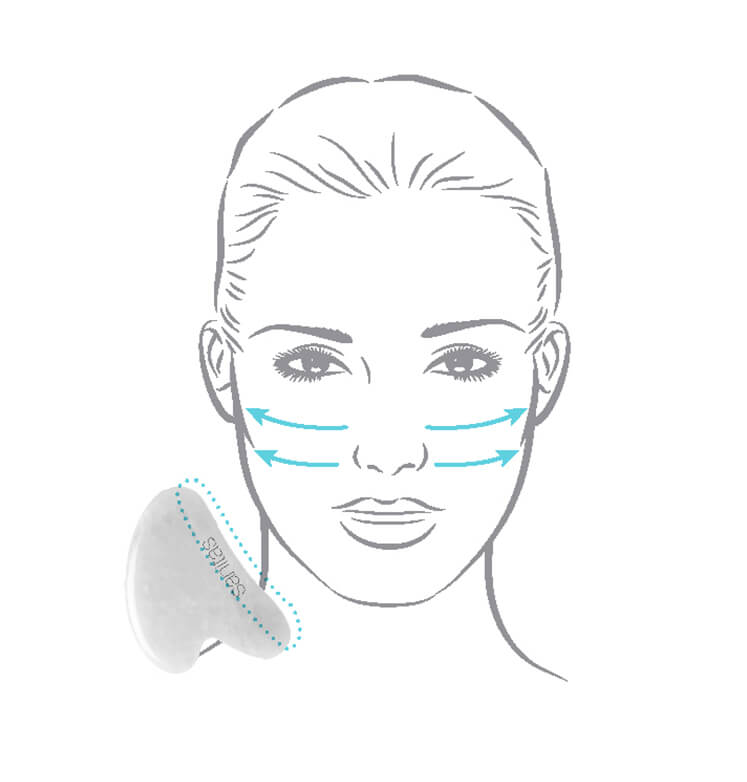
Step 3: Cheeks – 5 times
Using the flat side of the tool, begin at the bottom of the nose and slowly glide out towards the ear and hairline.
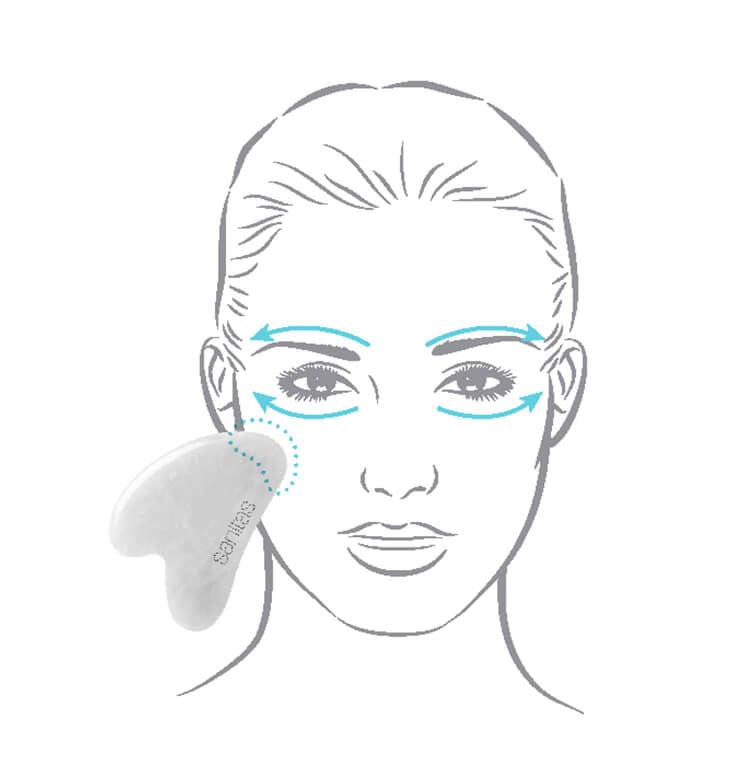
Step 4: Eyes – 3-5 times
For the lower eyes, use the rounded side of the tool and gently glide along the orbital bone out to the temple. For the upper eyes, start at the upper corner and follow the upper orbital bone to the temple
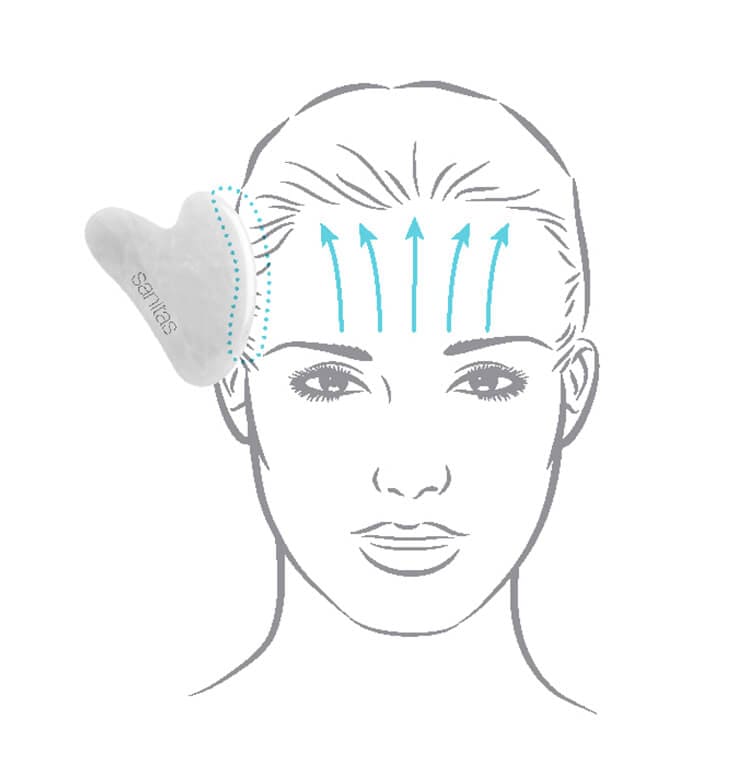
Step 5: Forehead – 3-5 times
Using the rounded side of the tool, start at the center of the forehead and move the tool straight up to the hairline. Repeat across the entire forehead.

We’re completely vertically integrated
From conception to production, we control every aspect of our products. Every single ingredient is hand selected by our in-house chemists and every product is manufactured by us to allow us ultimate quality control.
-
paraben-free | phthalate-free
![bubbling beaker icon]()
-
gluten free
![gluten free icon]()
-
eco-friendly
![globe icon with leaf at top icon]()
-
free of harsh preservatives
![filled beaker icon]()
-
sustainable packaging
![three arrows forming triangle icon]()
-
cruelty-free
![rabbit icon]()
-
small batch production
![hand palm up with falling leaf icon]()
-
made in Boulder, CO
![mountains with sun rising in the background icon]()
-
dye-free
![water droplet icon]()
-
ethically sourced ingredients
![heart with check mark icon]()